Regular price £19.99
Free Next Day Delivery
Buy Direct from the Makers
UK Customer Support
Support
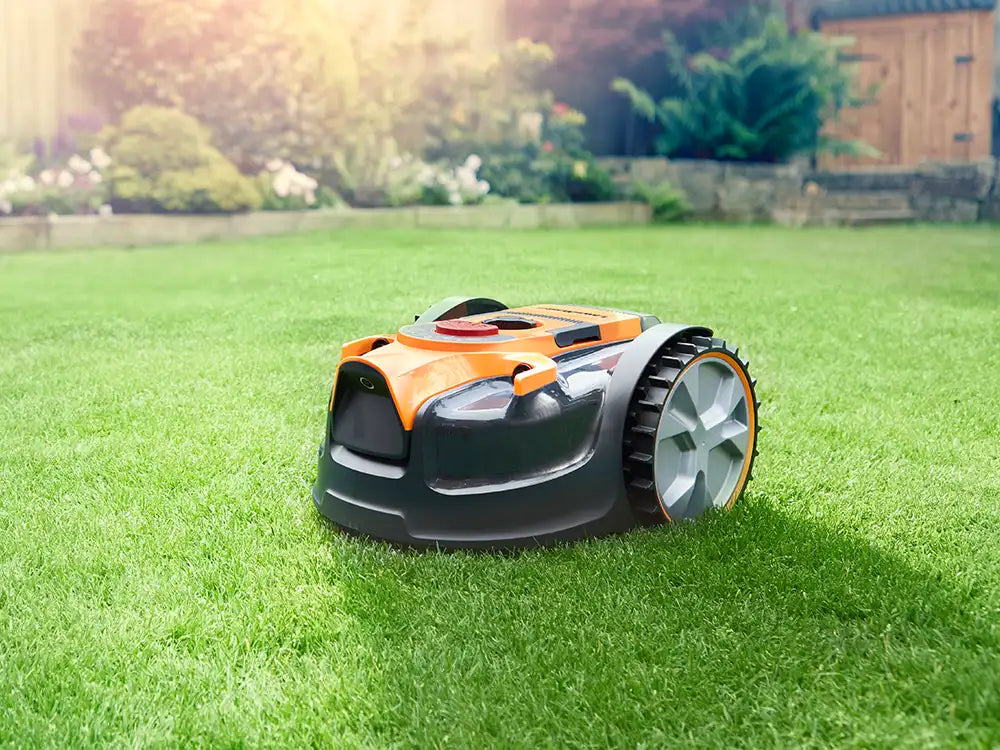
L10-01
Learn how to set up, use and update your L10 Robotic Lawn Mower with instruction manuals, user guides, videos and FAQs.
Learn how to set up the LawnMaster L10 Robot Mower with our quick start guide and video. Expect set up to take just over an hour and remember that you only have to do this once before you can sit back and watch it go!
Here are some quick checks to make sure your mower is set up correctly. Check that:
1. The boundary wire ends are not stripped too thin - leave plenty of wire core to connect to the terminals
2. The boundary wire ends are in the right terminals - wire running under the charging station plate to BLACK and wire running away from the charging station to RED
3. The charging station is oriented so that the terminals are on the left and open end on right (as viewed from the centre of the lawn)
4. There are no kinks, doubling back, loops or irregular angles along the boundary wire - remember that the robot will follow the exact path of the wire to return home to charge
5. The wire is straight for 1 metre in front of and behind the charging station and that it is in line with the charging station, or the mower may fail to dock or crash into the charging station
6. All connectors used in repairing or connecting extra lengths of boundary wire must be of the type supplied in the box (no chocbox connectors) and they should be fully clamped shut with pliers
Follow our step-by-step videos below to learn how to unlock, start, stop, adjust runtime and daily start time, and change the blades on your LawnMaster L10 Robot Mower.
How to change the working time:
1. Press the STOP button.
2. Unlock the control panel.
3. Press the time setting button to set the desired working time
4. Press the OK button, you will hear two beeps.
How to change the start time:
1. At the time you wish the mower to begin mowing every day, press the On/Off switch to the “O”
OFF position to turn off the mower.
2. Then turn on the mower and restart it. The new start time is now set.
How to mow the lawn's edge:
1. After finishing two days’ random working, the robotic mower will follow the boundary wire to cut the grass at beginning of the third day.
How to set the cutting height:
The cutting height of the mower can be adjusted from MIN (20 mm) to MAX (60 mm).
During the first weeks after installation, always select the cutting height (40 mm) to avoid damaging the boundary wire. After this, the cutting height can be lowered step by step every week until the desired cutting height has been reached.
1. Press the STOP button to stop the robotic lawnmower.
2. Open the hatch.
3. Turn the cutting height adjustment knob to set the cutting height.
- Turn clockwise to raise the cutting height.
- Turn counter-clockwise to lower the cutting height.
For the best performance and latest features, keep your L10 robot mower firmware up to date.
How to Install Firmware:
1. Download both firmware files below and save them to a blank USB flash drive/memory stick.
2. Ensure the files are not saved inside a folder and that there are no other files or folders on the memory stick. Do not change either of the filenames. If the files have downloaded with extra characters in the filename, please delete them when you save.
Firmware Part 1 file name is called L10_1.0.0.2
Firmware Part 2 file name is called randomMower
3. Make sure that the battery indicator is green and has sufficient charge to perform the software update.
4. Turn off the robot mower at the switch underneath and place it upside down on a clean, soft surface. Now is also a good time to perform any routine maintenance such as checking and replacing blades.
5. Using a cross-head screwdriver, remove the screws from the battery compartment in the deck of the mower.
6. Turn the mower back on at the switch and wait for two beeps.
7. Insert the USB flash drive and listen for 4 beeps. All time setting lights on the control panel will flash green. The program is installing. Do not remove the USB stick while the program is installing. This may result in damage to your mower.
8. When the update is finished (this may take several minutes), the mower will beep continuously. The flash drive can now be removed. The mower will beep twice indicating that the software update is complete.
9. Replace the battery cover and screws.
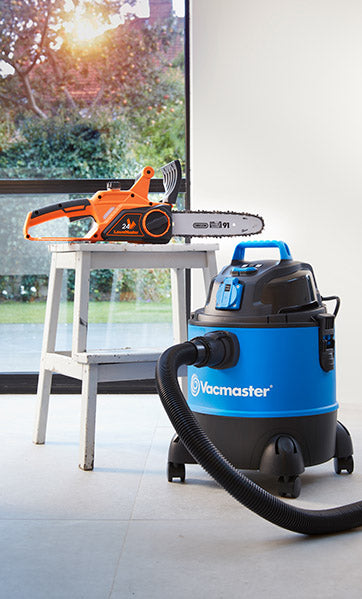
Genuine LawnMaster accessories and spare parts for your machine.
Regular price £19.99

Regular price £39.99

Regular price £29.99

Regular price £39.99

Regular price £14.99
Regular price £99.99

Regular price £10.99

Regular price £29.99
Spare Parts
We stock a wide range of spare parts if you'd like to repair your machine, rather than replace it. If you can't find the part you are looking for in the accessories section above, please get in touch with us. For safety, certain parts may not be available individually, but as part of a combined unit.
Whilst we don't anticipate you having any issues with your L Series Robot Mower, this guide is designed to help if you do.
FAQ
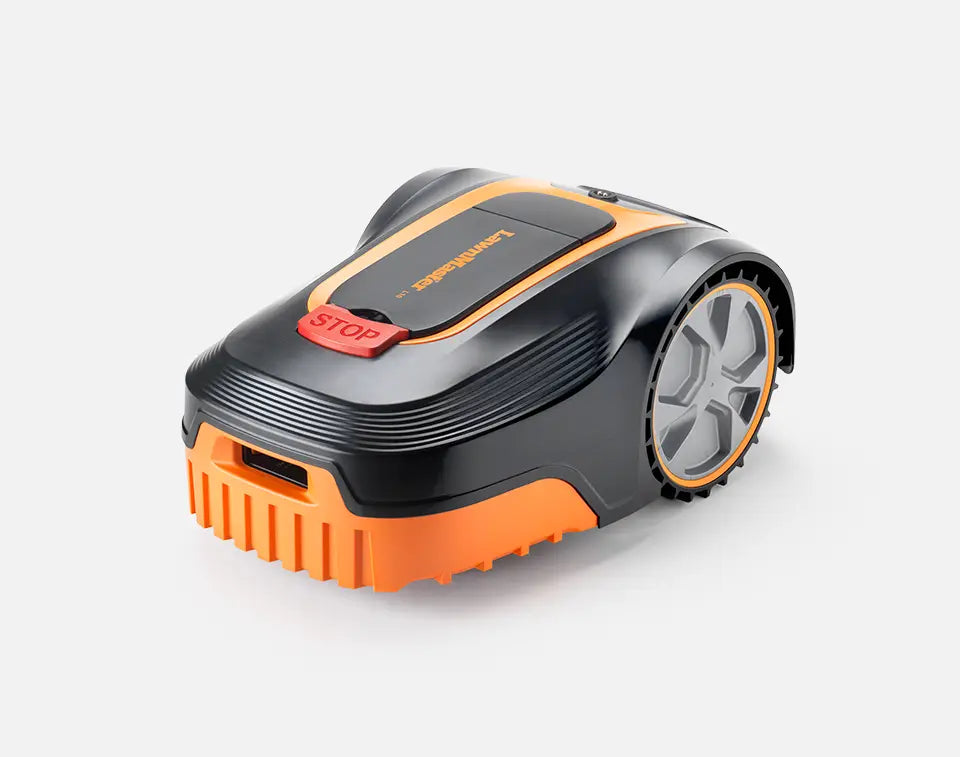
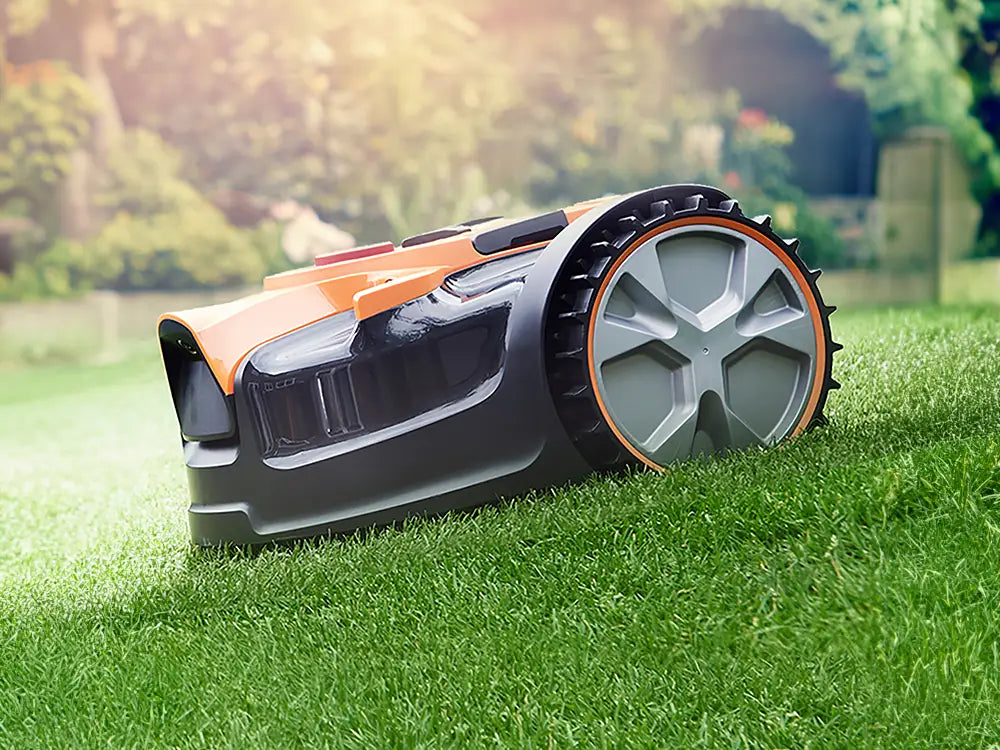
The LawnMaster L10 is a robotic lawnmower that will mow your lawn independently, freeing you up to either relax or get stuff done while the lawn is taken care of.
The L10 will alternately mow and charge, returning automatically to the charging dock when the battery is low.
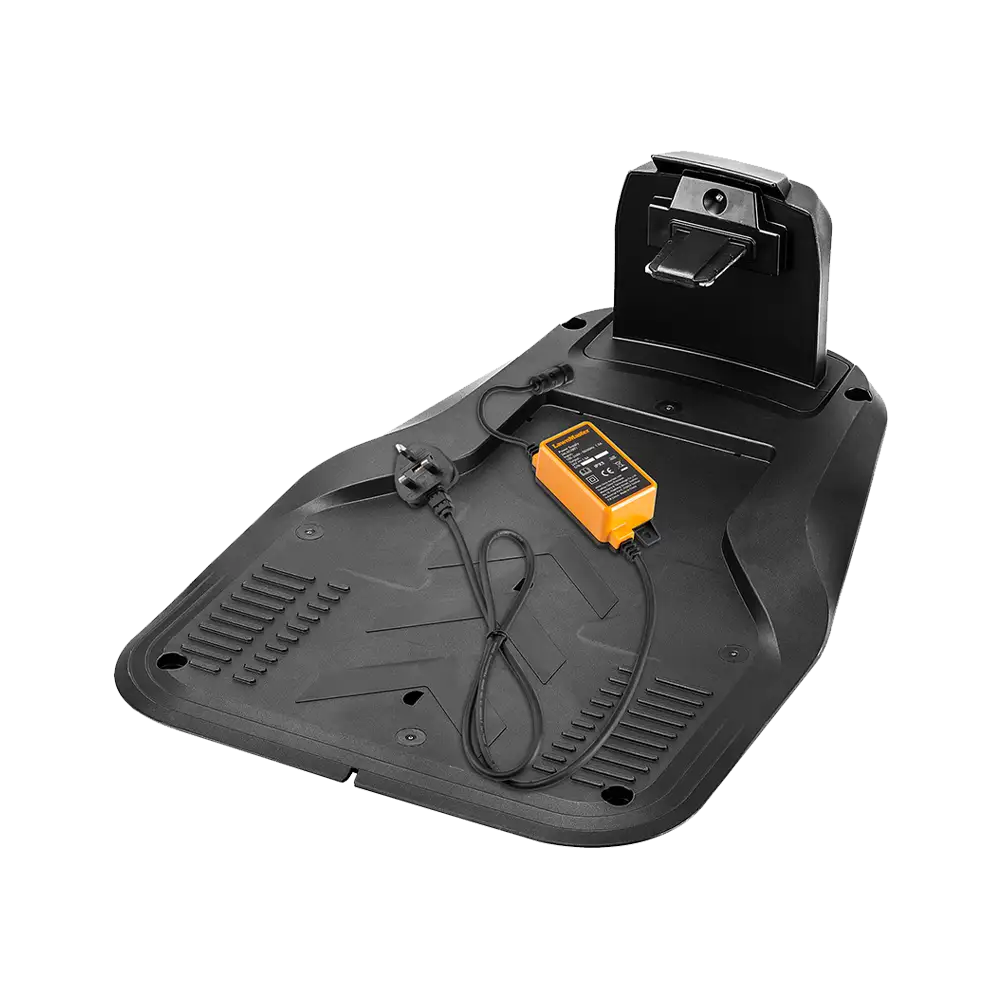
The mower is contained within the lawn by a boundary wire which is connected to the charging station. The charging station sends a safe, low voltage signal along the boundary wire which the mower senses and won’t go past.
The boundary wire should be laid around the area that is to be mowed and can be used to exclude the mower from certain areas and obstacles, such as trees, shrubs, raised beds and ponds.
Installation requires a boundary wire to be laid around the perimeter of the cutting area and connected to a charging station. This is simple but may take some time. However, the time spent setting up is one-time only, and is repaid by many hours of effort-free lawn maintenance!
The LawnMaster L10 mows little and often, shaving just the very tips off the grass with 3 sharp metal blades. These tiny clippings are not collected but are instead returned to the lawn surface where the nutrients contained in them fertilise the soil. This means stronger, healthier grass with less need for supplemental fertiliser. It also means no grass clippings to dispose of or compost.
No, the LawnMaster L10 will automatically return to the charging station by navigating anti-clockwise along the boundary wire when the battery is low. If the mower is charging within the mowing duration, it will resume mowing when the battery is fully charged again. If the mower is still charging when the mowing duration has ended, it will remain on stand-by in the dock until the next day.
The L10 can mow for durations of 4, 6, 8 and 10 hours. The mowing duration selected should depend on the time of year and the size of the lawn. For example, in spring it is advised to select a higher cutting height and longer duration, gradually reducing the height of cut until the grass is uniformly short. This will cause less stress to the lawn and give the best battery performance.
Once the grass has reached the desired length, the duration can be shortened to 4-6 hours for “maintenance cutting”, depending on the size of the lawn. For larger lawns, a longer duration may still be needed to maintain a desirable result.
The L10 can be programmed to start at a specific time each day. The start time can be changed by turning the mower off, then on again via the switch underneath the mower.
The L10 will mow every day, for the duration selected using the keypad. Please note that turning the L10 off via the switch underneath the mower for any reason will alter the start time. The new start time will be the time at which the mower is turned on again and the start operation is performed.
The L10 is extremely quiet at only 62dB. Enjoy a snooze while the L10 takes care of the lawn!
Although the boundary wire can be buried if desired, it’s not necessarily recommended. Cutting the grass very short where the boundary wire is to be laid is usually enough, and after a few weeks the grass will have grown over the boundary wire, making it practically invisible. Laying the boundary without burying it also makes it easier to make changes and repairs later.
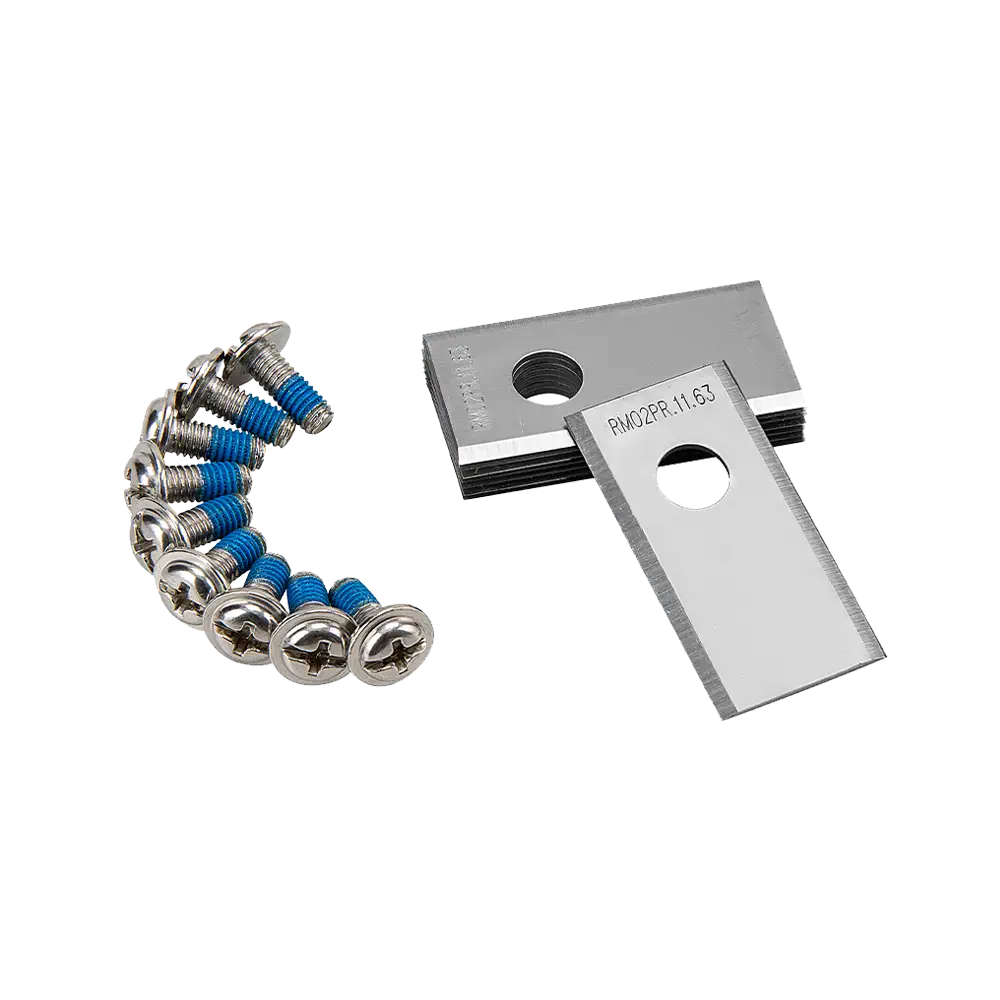
Replacement blades and other spares such as boundary wire, boundary wire repair kits and our patented labour-saving device, the LawnMaster Peg Driver, can be purchased from Accessories section above this FAQ block.
We recommend that blades are replaced whenever the lawn cut looks uneven, or blades appear to be damaged or worn during routine inspection.
Always replace in sets to preserve normal function of the machine.
If the boundary wire becomes damaged for any reason, it is quite simple to repair using connectors supplied with the mower. Extra wire can be spliced into the boundary to extend or repair it. Insert the ends to be connected into any two of the holes in the connector and clamp it shut with grips or pliers. The connector is filled with water-repellent grease and is waterproof.
Please call the help line on 0191 654 0036 and we can talk you through how to re-set your PIN. For security reasons, we may ask you about details relating to your order to verify ownership of the mower.
The L10 requires PIN code entry after each time the stop button is pressed, or the machine is turned off and on again via the switch underneath the mower. This removes the possibility for children and unauthorised persons to operate the machine.
The L10 has passed rigorous tests to ensure that it is compliant with the latest safety standards set by European regulators. The blades will stop if the product is lifted, tilted or bumps into an object. However, for added safety, we recommend not to leave children and pets unattended while the L10 is operating nearby.
It is recommended to bring the L10 indoors to a dry garage or shed when the main growing season is finished (usually around the end of October). The product should be charged before storing to keep the battery in optimum condition. It is also recommended to give the mower a thorough clean and take the opportunity to replace blades and check for software updates before the new season. The charging station can be left outside year round.
The L10 is equipped with a bump sensor, meaning that if the mower bumps into a large, unmoving object, it will stop, reverse and continue in a different direction. However, it is recommended to remove or cordon off (using the boundary wire) sloping stones, trees with fragile bark, angled tree supports, exposed tree roots, shrubs and ponds
to prevent damage to both the mower and the object.
Smaller objects such as children’s toys, pet toys, tools, sticks and small stones should be removed from the lawn as they pose a risk of damaging the mower.
Temporary physical boundaries can be placed on the lawn to deflect the L10 during the growing season for daffodils and other bulbs. To protect them, we recommend sinking lengths of bamboo cane (approx. 40cm tall) into the lawn at 15cm intervals from each other to form a temporary barrier around the patches which require protection. Ensure at least 20cm remains above ground level. This method can also be used around areas that may need reseeding throughout the season.
The L10 has a built-in rain sensor which is designed to detect wet conditions. When the rain sensor is triggered, the mower will return to the charging station until the sensor dries out naturally. This prevents damage to the lawn from the wheels operating in wet conditions and avoids extra load on the motor and battery caused by cutting in wet conditions.
Measure the length of each string between each cane. Add them together. This is the run of the slope. Measure the vertical distance from the bottom of each cane to where the string meets. Add them together. This is the rise.
The formula for calculating the gradient is (Rise/Run) *100
If you have two lawns which are connected by a corridor or path which wider than 1m and all on the same level, the L10 can navigate this as part of normal operation. We would not recommend that you attempt to allow the L10 to navigate a corridor of gravel, as this may damage the cutting mechanism.
If you have multiple lawns separated on different levels or separated by obstacles which would prevent the L10 from gaining access (such as a fence), the L10 will need to be moved manually to the secondary lawn. In order to do this, the boundary wire is set up as normal around the main lawn, and the secondary lawn is wired up as an island.
For more details on how to set up the L10 to mow secondary lawns, please refer to the instruction manual.
You may still require a traditional mower if your garden has tricky areas that the L10 cannot navigate, such as steep slopes, extremely bumpy areas, or areas exposed to the general public, such as front lawns.
Although the L10 has an edge cutting function, it will still leave a small border (around 20cm) of lawn un-cut where the boundary wire is laid 30cm away from the edge of the lawn. We recommend using a grass trimmer to tidy the edges.
The L10 comes with a 2-year warranty against manufacturing defects. This does not cover wear and tear, consumables such as blades, accidental damage or use not in accordance with the recommendations. If you suspect your L10 has a defect, please contact us using the form below.
The L10 can cut a maximum area of 400m2. In order to achieve the best finish, we recommend cutting the lawn to 30mm with a traditional mower before starting the L10 for the first time. This will result in a neat finish from the start.
Alternatively, the L10 can be started at a relatively high height of cut (40mm) and allowed to cut the grass down gradually. It may take several days to achieve a uniform finish this way, depending on the size of garden.
We recommend inspecting your L10 every 8 weeks to check for damage and wear to the blades. During this time, it can be useful to give the mower a clean with a cloth or brush to remove any built up grass and mud, particularly in the wheel treads.
The L10 is IPX5 rated, meaning that it can be cleaned using a standard garden hose if necessary. Do not use high powered jet wash equipment for this task.
The L10 automatically senses when the battery is low and will return to the base station along the boundary wire.
During a mowing period of 8 hours, the mower will return to the base to be charged multiple times. The amount of times will depend on the length of grass being mown.
We designed our L10 to be as simple to use as possible, meaning no apps needed to use it. The mower is controlled completely from the keypad on the machine.
We recommend changing the blades at the start of a new season. However, we recommend checking the blades for wear every 8 weeks. Replacement blades can be purchased in the accessories section above.
Please check the troubleshooting guide above.
Solutions to many common problems can be found there. The mowing schedule can be affected by turning the mower off at the switch on the deck.
If the mower has been switched off in this way, please return the mower to the lawn, turn it on and start it again at the time of day that mowing is desired to take place.
If the mower is fully charged, unresponsive (i.e. does not beep when the on/off switched is pressed) and there are no lights on the control pad, please contact us using the form below.
Learn

4 Min Read
5 Min Read
3 Min Read
Support
We’re here to empower you with the knowledge and solutions to make the most of your machine, and to support you when you just need a helping hand. Our friendly, UK based, customer service team are here to help.
This LawnMaster appliance, spare parts and accessories carry a 2-year guarantee.
Free and Fast Delivery:
We offer free delivery on all UK mainland orders* and free next working day delivery on all orders that include an appliance.
Orders for spare parts and accessories are despatched via a 48hr standard delivery service.
* Delivery charges apply for addresses in the Channel Islands, Northern Ireland, Isle of Scilly and Man.
Returns:
We hope that you are happy with your purchase but if that's not the case, unused, undamaged products can be returned for a refund within 30 days of receipt.
Our aim is to keep it personal. Our friendly UK based customer service team are there if you need a helping hand.
Sign up to our mailing list and get 10% off your next purchase, plus access to exclusive benefits including: