
Regular price £59.99
Free Next Day Delivery
Buy Direct from the Makers
UK Customer Support
Support
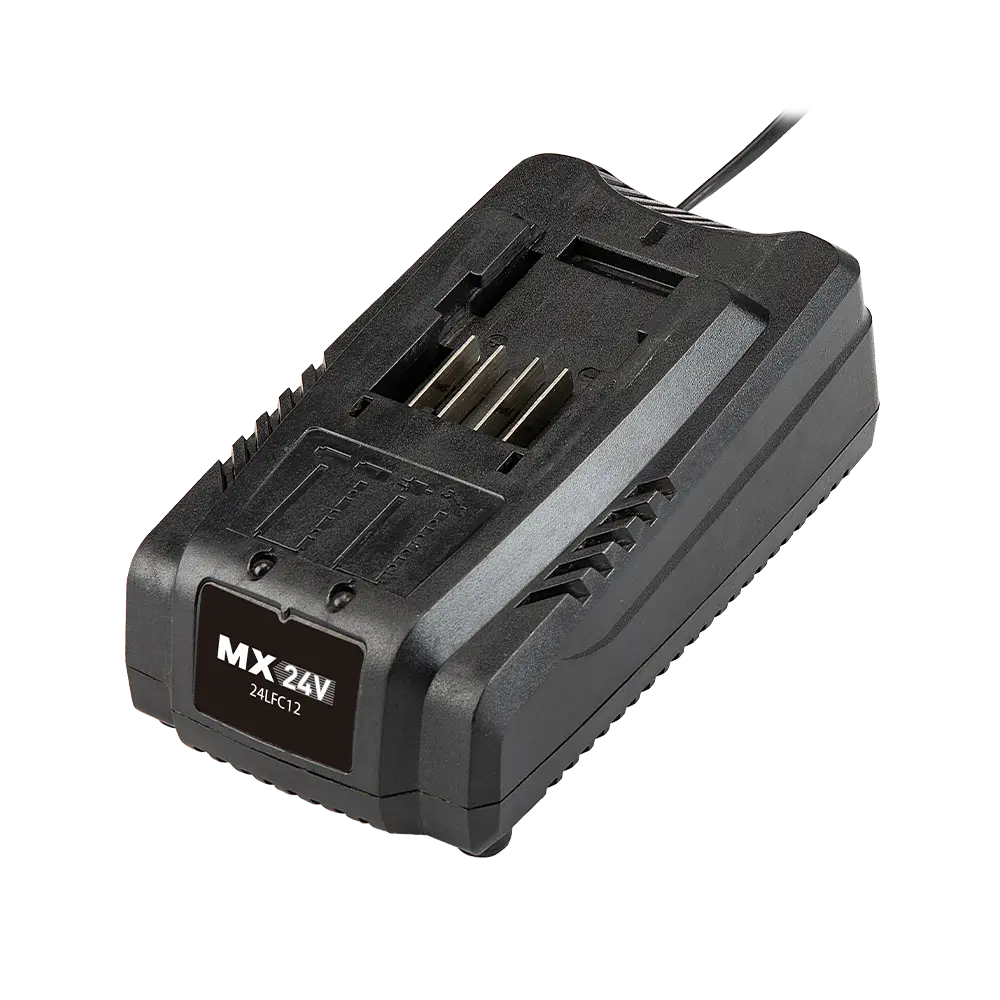
CLCS2425-01
Learn how to set up and use your cordless chainsaw with instruction manuals, user guides and FAQs.

Assembling the Guide Bar and Chain
Watch the video below for step-by-step instructions on how to assemble the guide bar and chain on the LawnMaster 24v chainsaw.
1. Lie the chainsaw on a level surface.
2. Turn the locking knob anti-clockwise to remove the chain cover.
3. Spread out the saw chain in a loop so that the cutting edges are aligned in a clockwise direction.
4.Fit the chain around the guide bar ensuring that the direction of the chain is correct as per the manual.
5. Align the guide bar and saw chain assembly with the support bolt and drive sprocket on the product. Place the guide bar on the support bolt and lay the saw chain around the drive sprocket.
6. To assemble, hold the guide bar tilted upwards at an angle of approx. 45 degrees in order to be guide the saw chain more easily onto the drive sprocket. It is normal for the saw chain to sag.
7. Pre-tension the saw chain by turning the tensioning plate in a clockwise direction.
8. Replace the chain cover. Make sure the lug on the cover is first placed in
Cleaning
1. Clean the chain saw thoroughly after every use. In this way, you extend the life of the machine and avoid accidents.
2. Keep the gripping handles free of petrol, oil or grease. Clean the gripping handles, where appropriate, with a damp, soapy cloth. Use no solvents or petrol for cleaning!
3. Clean the saw chain after every use with a paint brush or cloth. Do not use any liquids to clean the chain. After cleaning, oil the chain lightly with chain oil.
4. Clean the ventilation slots and the surfaces of the chain saw with a paint brush or dry cloth. Do not use any liquids for cleaning.
Oiling the Saw Chain
Clean and oil the chain regularly. In this way, you keep the chain sharp and get optimum performance.
Use cut-protection gloves when you are handling the chain and the guide bar.
1. Oil the chain after cleaning, after 10 hours of use or at least once weekly, depending on which comes first.
2. Before oiling, the guide bar must be cleaned thoroughly, in particular the teeth of the rail. Use a brush and a dry cloth to remove any debris.
3. Oil the individual chain links with the aid of an oil suction gun with pinpoint tip. Place individual oil drops onto the articulated links and onto the tooth tips of the individual chain links.
Maintaining the Guide Bar
1. Switch off the saw and remove the battery.
2. Remove the chain cover.
3. Remove the guide bar and saw chain assembly from the support bolt.
4. Carefully remove the saw chain from the guide bar.
5. Check the guide bar for wear. Remove burrs and straighten the guide surfaces with a flat file.
6. Clean the oil port, in order to guarantee automatic oiling of the saw chain. The guide bar must be flipped over every 8-10 working hours in order to guarantee even wear. Flipping over the guide bar requires you to move the tensioning plate to the other side of the bar.
To flip over the guide bar:
1. Locate the fixing screw connecting the guide bar and the tensioning plate on the other side of the guide bar.
2. Release the fixing screw with a Phillips screwdriver to separate the tensioning plate from the guide bar.
3. Keep the tensioning plate in the same position and reverse the guide bar. Re-tighten the fixing screw to secure the tensioning plate to the guide bar.
NOTE: The round lug of the tensioning plate must point towards the drive sprocket.
4. Assemble the guide bar, the saw chain and the chain cover and tension the saw chain referring to the video guide in the Setting Up section above.
Battery and Charger Maintenance
1. Keep the battery and charger clean and clear of debris. Do not allow foreign material into the recessed cavity or on the contacts. Wipe with a dry cloth. Do not use solvents, water, or place in wet conditions.
2. Always unplug the charger when there is no battery in it.
3. Check that the charger and battery contacts have not been shorted by debris.
4. Always store away from metal objects which could create a connection with the terminals.
5. Always remove the battery when storing the blower and keep in a cool dry place out of direct sunlight.
6. Store the battery only within a temperature range between 0°C and 25°C.
7. We recommended storing the lithium-ion battery in a 30%-50% charged condition.
Genuine LawnMaster accessories and spare parts for your machine.
Regular price £59.99
Regular price £39.99
Regular price £24.99
We stock a wide range of spare parts if you'd like to repair your machine, rather than replace it. If you can't find the part you are looking for in the accessories section above, please get in touch with us. For safety, certain parts may not be available individually, but as part of a combined unit.
Whilst we don't anticipate you having any issues with your chainsaw, here's some troubleshooting guidance if its not performing at its best.
________________
01. I think I’ve damaged the saw chain and its stopped rotating. What do I do?
This could be because the:
1. The chain brake is on. Check the chain brake and release it if necessary. Refer to ‘Checking the Chain Brake Handle’ section on pages 26-27 of the instruction manual.
2. The chain tension is too loose or too tight. Adjust the chain tension. Refer to Tensioning the Saw Chain in the video guide in the Setting Up section above.
3. The chain oil tank is empty. Refill with the correct oil.
4. The guide bar or saw chain has been damaged. Replace with 25cm Oregon Bar and Chain.
________________
02. My chainsaw isn't reaching full power anymore, why?
The air vents may be blocked. Clean the air vents to restore full power.
________________
03. Why has the guide bar and saw chain started to overheat?
This could be due to:
1. The chain oil tank being empty and the chain requiring lubrication. Refill with the correct oil.
2. The chain tension being too tight. Adjust the chain tension. Refer to Tensioning the Saw Chain section on pages 24-25 of the manual or in the maintenance section above. This is also covered in the set-up video guide.
FAQ
Watch the video below for step-by-step instructions on how to assemble the guide bar and chain on the LawnMaster 24v chainsaw.
Yes.
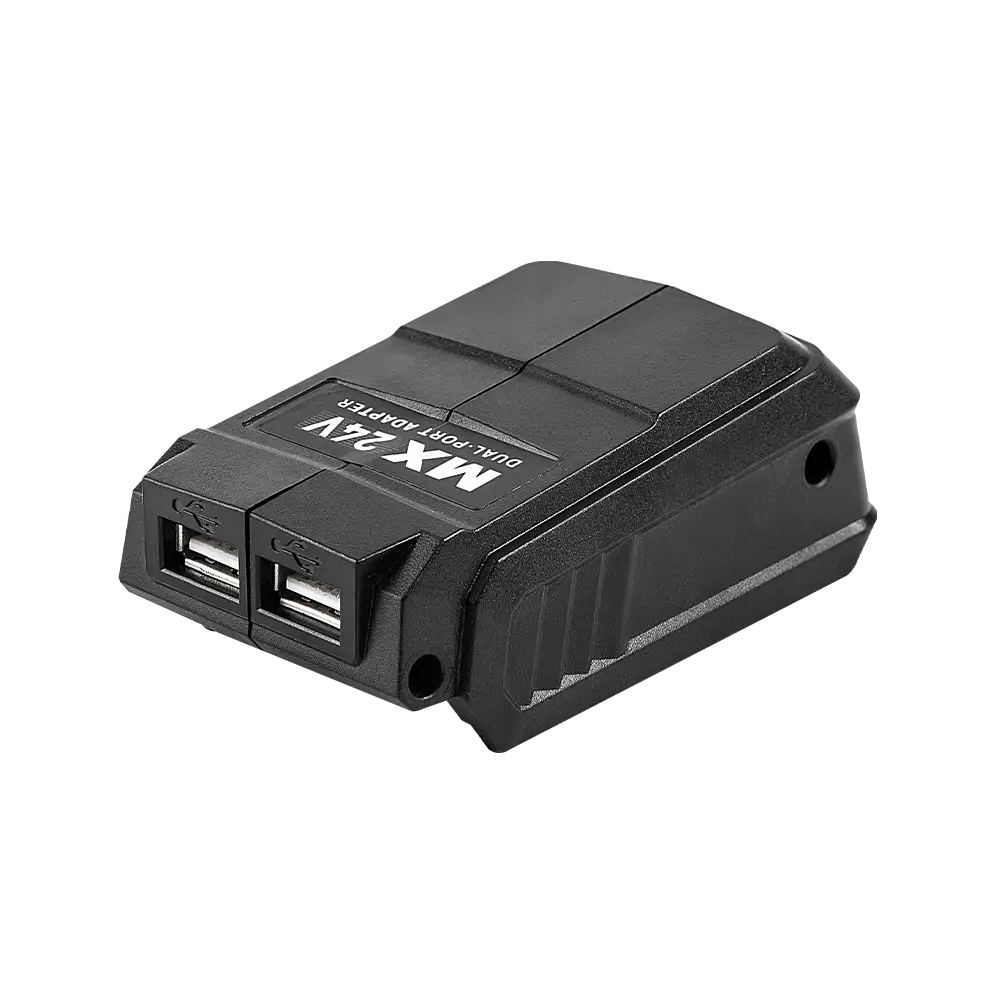
This MX 24V 4.0Ah lithium-ion battery and fast charger.
Learn
3 Min Read

2 Min Read

3 Min Read
Support
We’re here to empower you with the knowledge and solutions to make the most of your machine, and to support you when you just need a helping hand. Our friendly, UK based, customer service team are here to help.
This LawnMaster appliance, spare parts and accessories carry a 2-year guarantee.
Free and Fast Delivery:
We offer free delivery on all UK mainland orders* and free next working day delivery on all orders that include an appliance.
Orders for spare parts and accessories are despatched via a 48hr standard delivery service.
* Delivery charges apply for addresses in the Channel Islands, Northern Ireland, Isle of Scilly and Man.
Returns:
We hope that you are happy with your purchase but if that's not the case, unused, undamaged products can be returned for a refund within 30 days of receipt.
Our aim is to keep it personal. Our friendly UK based customer service team are there if you need a helping hand.
Sign up to our mailing list and get 10% off your next purchase, plus access to exclusive benefits including: