Regular price £19.99
Free Next Day Delivery
Buy Direct from the Makers
UK Customer Support
Support
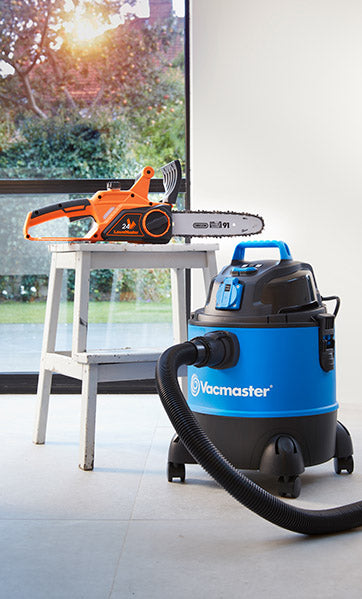
VBRM16 COMBO
Discover all you need to know about the OcuMow® Drop and Mow robotic lawnmower with trimmer and whether this is the right robot for your garden. Learn how to set up, use and update your robot with instruction manuals, user guides, videos and FAQs.

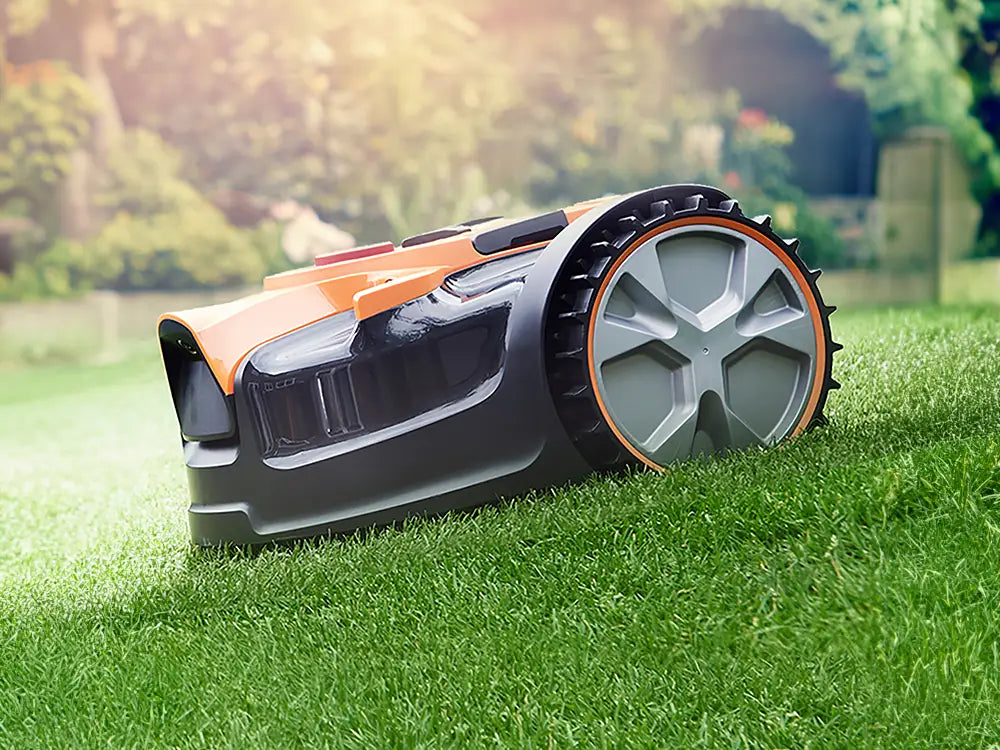
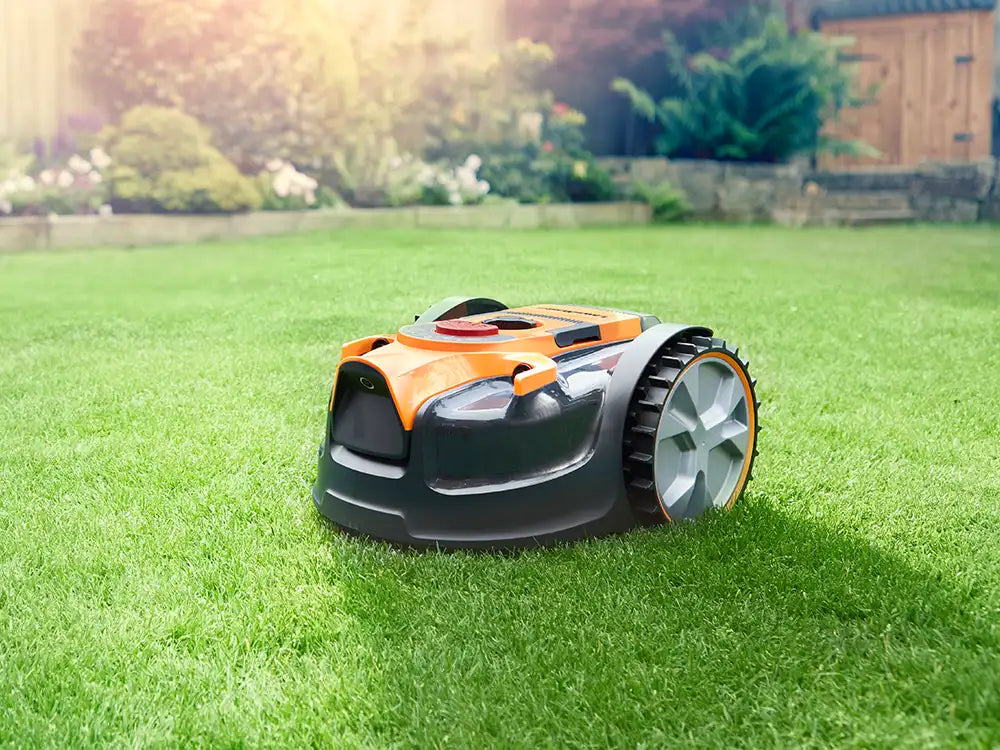
LawnMaster OcuMow VBRM16 robot mower arrives fully assembled. Watch the video below to discover all you need to know about starting and running your robotic lawn mower.
The VBRM16 OcuMow® is very simple to operate. It uses a camera combined with two ultrasonic sensors to navigate independently around your garden. The camera detects the difference between surface textures and colours, for example grass or paving, and the ultrasonic sensors detect obstacles higher than 6cm, such as plants, garden furniture, walls and fences meaning there is no need for a boundary wire.
To keep the mower within the lawn area, your lawn must be bordered on all sides by a hard, visually distinctive border. This can be a flat border of paving, gravel or wooden boards, or a raised edge such as border edging, walls or fences. The mower can detect some edges that are not distinctive however for best and correct operation making your borders clearly defined will improve edge detection and allow the robot to work correctly.
Assembling the Handle Shafts
1. Insert the upper and lower handle shafts securely into the middle handle shaft and ensure the locking buttons are fully engaged and locked into position.
Attaching the Auxiliary Handle
2. Loosen the handle adjustment knob anti-clockwise and remove it from the auxiliary handle.
3. Pull the ends of the auxiliary handle to extend it and slide it over the handle holder.
4. Adjust the auxiliary handle to desired operating position.
5. Insert the handle adjustment knob and turn it clockwise to tighten with moderate force. If it feels too tight, turn the handle adjustment knob anti-clockwise to loosen.
Fitting the Safety Guard
6. Position the safety guard over the trimmer head and onto rear of the motor housing.
7. Secure the guard with screws using a screwdriver.
For a quick video guide, watch the video in the Setting Up section above.
How to Operate the LawnMaster VBRM16 OcuMow® robot mower and grass trimmer:
The OcuMow® is designed to detect grass and move into areas it identifies as grass. If it cannot see a clear boundary it will continue to move into areas off the lawn and into plants that it may identify as grass. Trimming the lawn edge with the supplied grass trimmer before use will help define a better lawn edge.
During first operation it is important to monitor the robot as it detects edges to see where the boundary definition needs to be improved.
Step 1:
Trim your lawn edges with the included 25cm grass trimmer so that the mower can see the edges well and isn’t stopped by any longer grass. If your grass is fairly long, it’s a good idea to start the mower at a higher height of cut for the first mow and adjust it down on subsequent mowing.
Step 2:
Check that the lawn surface is clear of any tools, sticks, stones, toys and other obstacles which may damage the blades or undercarriage.
Step 3:
Remove the battery from the charger and insert it into the mower. Insert the safety key.
Step 4:
Press the On/START button and wait for the battery indicator to turn green and the mower to beep. This gives the camera time to warm up and any attempts to start the mower sooner will result in an error. Once the mower has beeped, long press the Automow button and then press START. The mower will begin to mow in a random pattern and will continue to mow until it runs out of charge.
Spot Cut Function:
If the mower has missed any patches of lawn, these can be cut using the spot cut function. To use this function, make sure the machine is powered on. Place the mower on the patch to be cut and long press the spiral button, then press START.
The mower will cut in a spiral out from where it was placed on the lawn cutting any remaining grass it may have missed.
Step 5:
When the mower has finished, remove the battery and place it back on charge for next time. Clean the mower underside with a clean, dry brush, and store in a dry place.
The mower should only be used in the daytime so that the camera can easily see the lawn surface, and should be placed into storage between uses.
Robot Mower Maintenance:
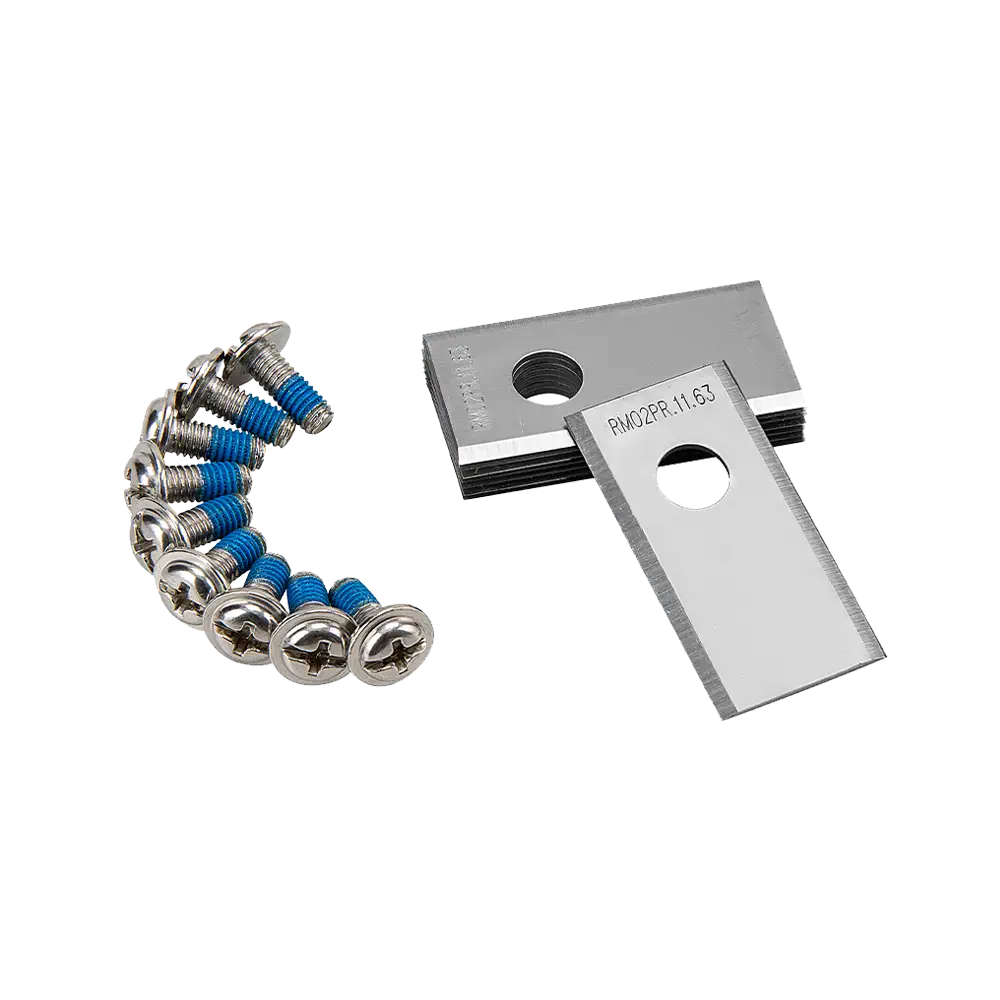
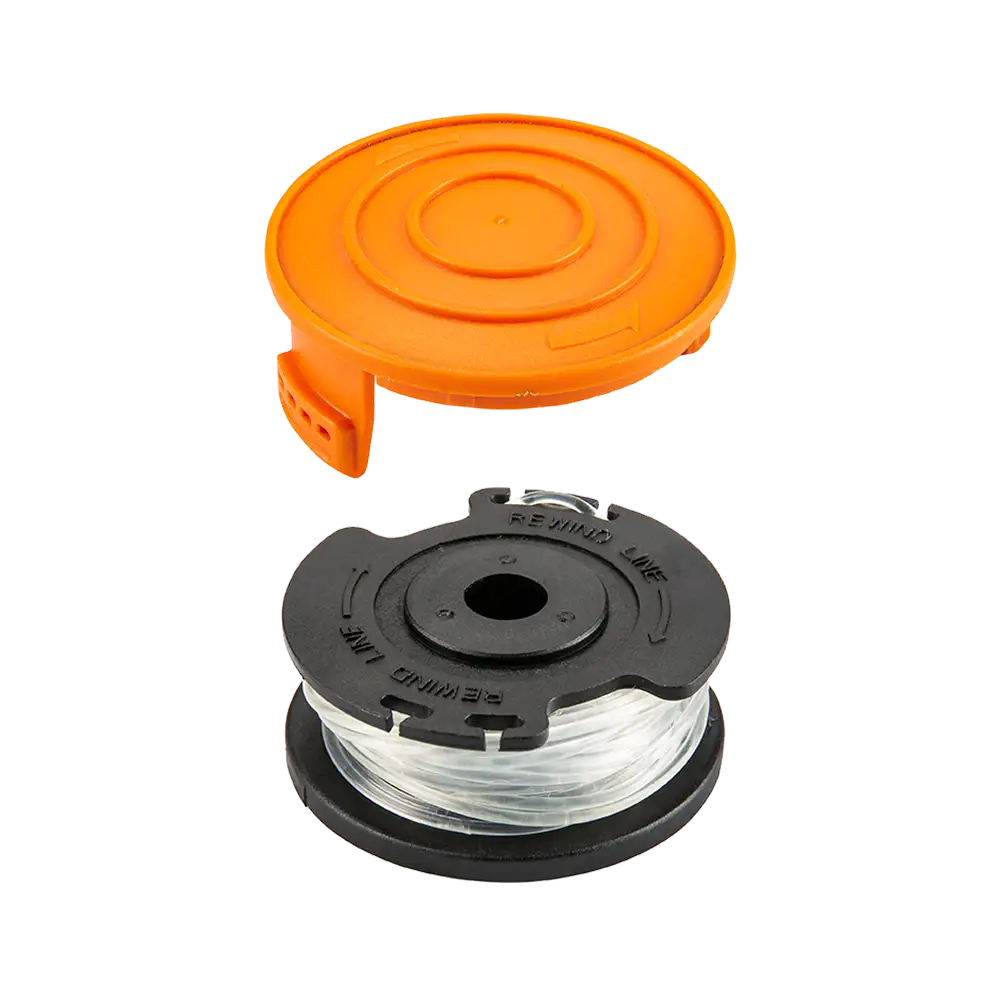
To replace the blades
1. Lift the battery compartment cover. Remove the isolator key and the battery.
2. Slowly turn the mower over. Place it on a soft and clean surface.
3. Use a suitable tool (e.g. a screwdriver) to insert into one of three holes in the blade disc to fix it in place. This ensures the blade disc is not turning when replacing the blades to avoid personal injury.
4. Wear protective gloves and remove all three screws and blades with a screwdriver.
5. Secure the new blades with new screws.
6. Make sure all blades can spin freely.
Cleaning the underside
It is recommended to check and clean the underside of the robotic mower regularly.
7. Press the STOP button and allow the blade to come to a complete stop.
8. Lift the battery compartment cover. Remove the isolator key and the battery.
9. Slowly turn the mower over. Place it on a soft and clean surface.
10. Use a soft brush or damp cloth to remove dirt, dust, oil, grease, etc. from the underside of the mower.
IMPORTANT: Do not wash the mower with running water.
1. Wear safety gloves to clean the blade disc, the chassis, and the front and rear wheels
thoroughly with a soft brush or damp cloth. Remove any lodged debris around them.
2. Make sure the blade disc can rotate freely and all blades can spin freely.
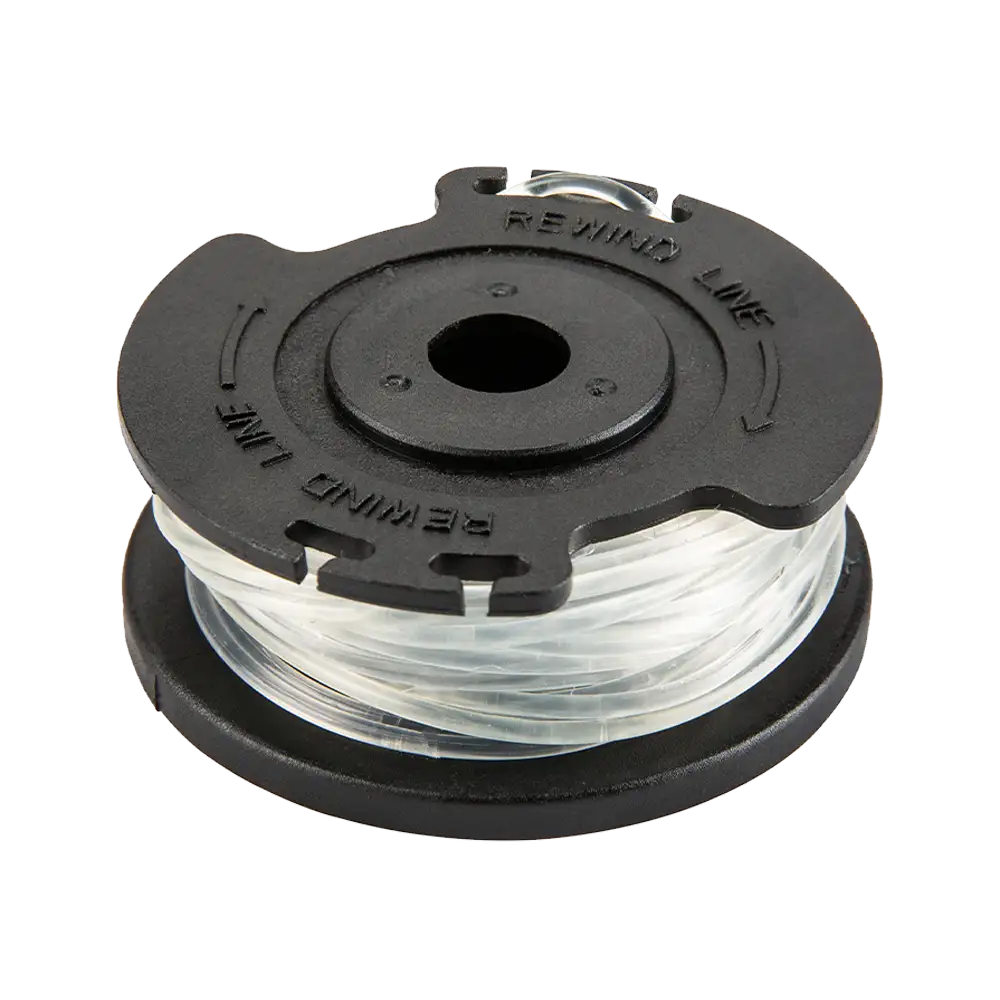
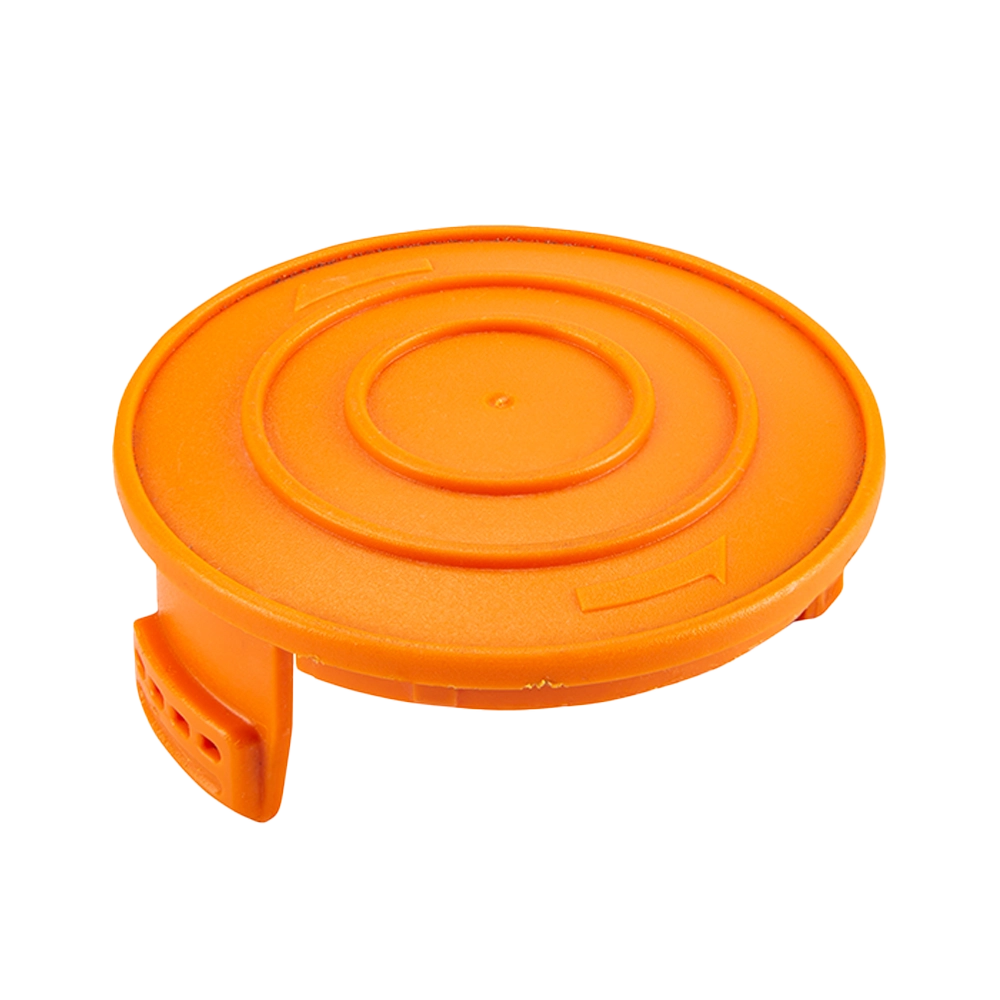
Grass Trimmer Operation and Maintenance:
Watch the videos below to learn how to use your new grass trimmer and replace the grass trimmer spool and line.
For the best performance and latest features, keep your OcuMow® VBRM16 LawnMaster robot mower firmware up to date.
NO UPDATES ARE AVAILABLE AT THE MOMENT.
When updates are available, please follow the below installation instructions:
How to Install Firmware:
1. Download the software file above and save it to a blank USB flash drive/memory stick. Do not change the filename. The filename should show as border - if the file has downloaded with a (1) or (2) in the filename, please re-name the file when you save it.
2. Make sure that the battery indicator is green and has sufficient charge to perform the software update.
3. Remove the safety key and turn the mower on its side on a clean, soft surface.
4. Open the USB port rubber cap (in the mower deck) to reveal the USB port.
5. Insert the safety key and long press the START/ON button for 3 seconds. Wait for the green lights to stop flashing and the mower to beep.
6. Insert the USB flash drive into the USB port. You will hear four beeps and the indicator lights will flash green. The software is now updating.
7. When the software update is complete, the mower will beep continuously, and the battery indicator light will be lit green.
8. Remove the USB flash drive and replace the rubber cap. To complete the software update, restart the machine by removing and reinserting the safety key.
Genuine LawnMaster accessories and spare parts for your machine.
Regular price £19.99
Regular price £9.99

Regular price £14.99
Regular price £59.99
Regular price £39.99
Regular price £19.99
Regular price £9.99
We stock a wide range of spare parts if you'd like to repair your machine, rather than replace it. If you can't find the part you are looking for in the accessories section above, please get in touch with us. For safety, certain parts may not be available individually, but as part of a combined unit.
FAQ
If the mower cannot recognise a clearly defined lawn edge, it may not stay within the lawn area. Bare earth borders which can become weedy, or flower borders with low plants can be interpreted as grass by the Optical Grass Recognition (OGR) software. For this reason, we recommend that either raised edges, a hard border of paving or gravel, or walls and fences are the best options around the lawn.
Unlike traditional robots the VBRM16 OcuMow® is designed to Drop and Mow. The mower is designed to be placed on the lawn once or twice a week and will mow for up to 4 hours on a single charge covering 100m2. The mower should be stored away in a dry place between uses.
The mower stops approximately 10 - 20cm away from the edge of the lawn, meaning some grass will remain uncut. This can easily be taken care of with the MX 24V 25cm included grass trimmer.
Lawn edges should be kept neatly trimmed so that the VBRM16 OcuMow® can easily see the edge of the lawn.
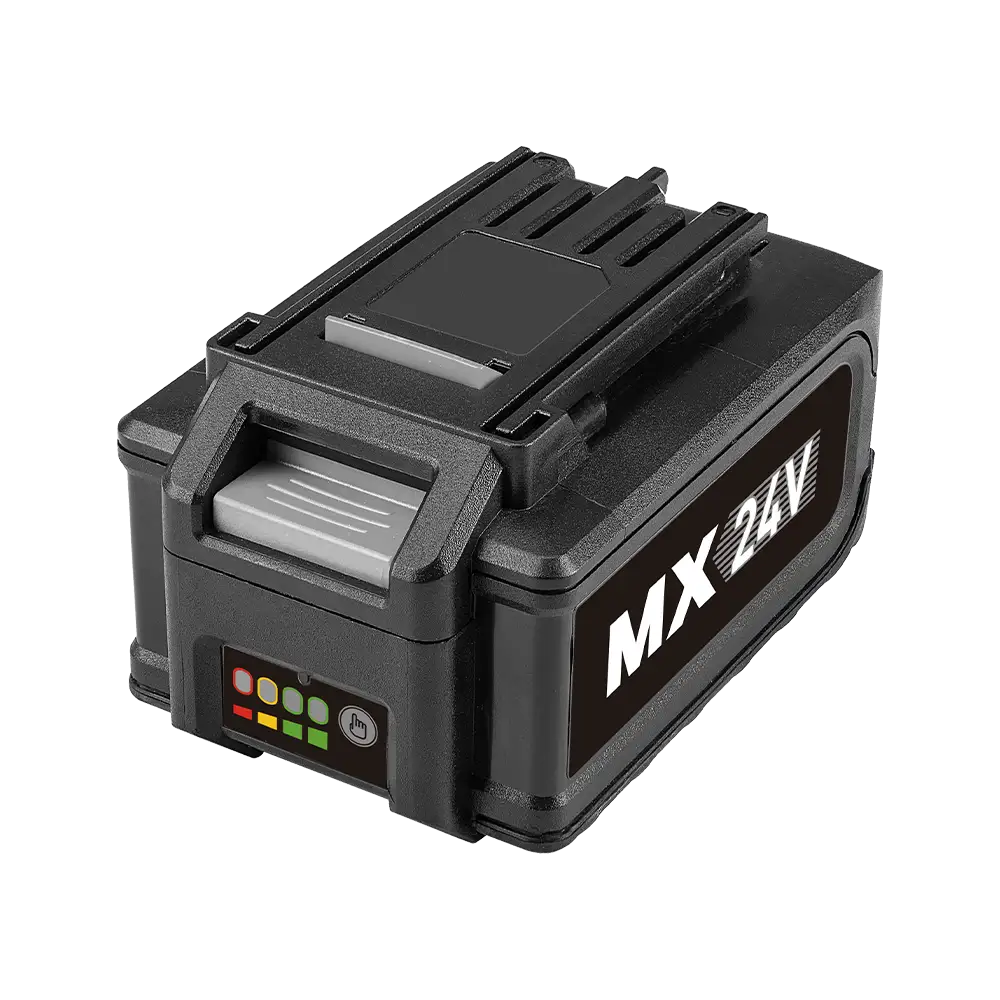
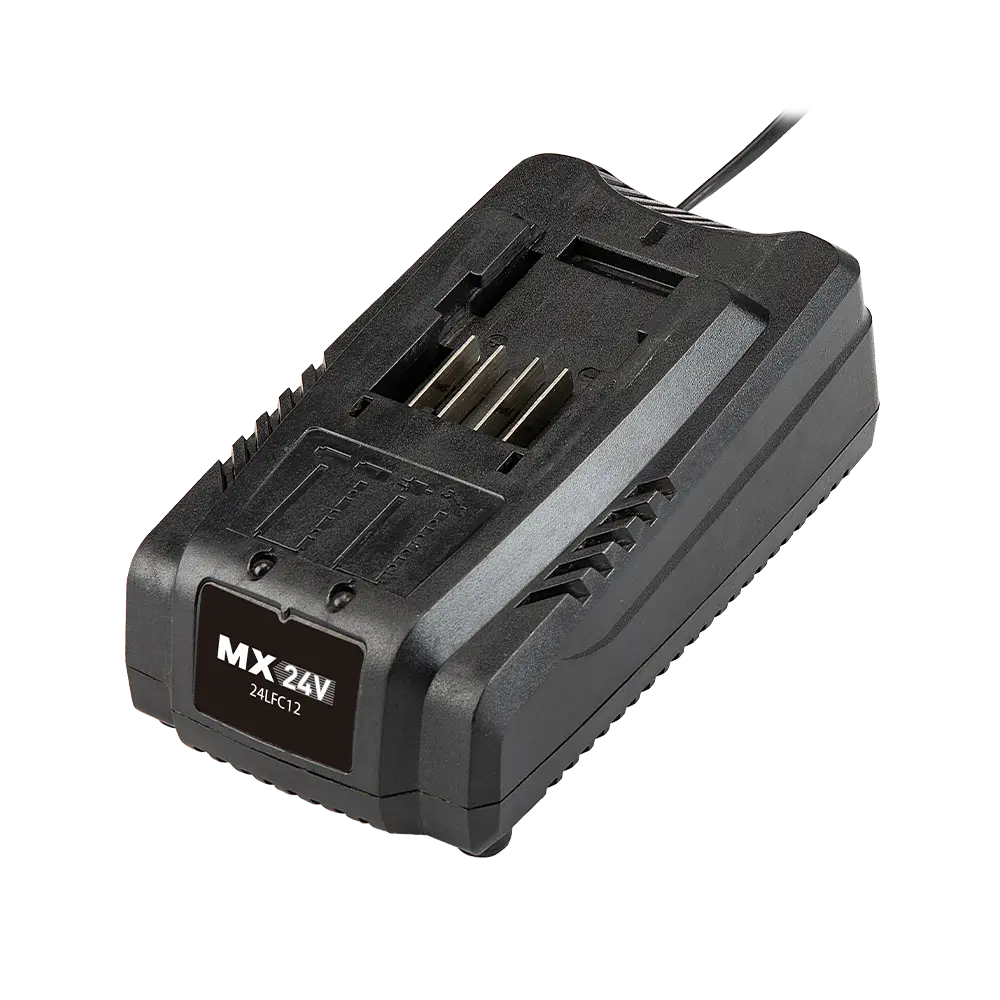
The VBRM16 OcuMow® works with our MX 24V 4.0Ah battery. The mower will cover 100m2 on a single charge. Lawn coverage can be increased with the additional battery supplied with grass trimmer.
No. As the VBRM16 OcuMow® requires good light in order for the camera to function, this mower can only be used in the daytime. The robot will not operate outside daylight hours.
The grass is cut using three small sharp blades and the clippings are returned to the lawn surface where the nutrients contained in them fertilise the soil. This means stronger, healthier grass with less need for supplemental fertiliser and has the added bonus of helping the lawn retain water in dry periods. It also means no grass clippings to dispose of or compost. Provided that the VBRM16 OcuMow® is used regularly (i.e., once or twice a week) the clippings are not visible to the eye.
It is possible to use the VBRM16 OcuMow® on lawns with a pond, however it is strongly recommended that the pond is surrounded by a raised barrier to safeguard against the mower falling in. We recommend either a raised edge or a paved/gravel border at least 75cm wide surrounding the pond. Water damaged mowers are not covered under guarantee.
The VBRM16 OcuMow® has a safety key which can be removed to prevent children starting the mower unsupervised. Safety sensors stop the blades if the mower is lifted or flips over. The mower is also equipped with ultrasonic sensors which will avoid obstacles higher than 6cm. We recommend that children and pets are not left unsupervised with the mower while it is operating.
Yes, both the VBRM16 OcuMow® robot and grass trimmer are part of our MX 24V Shared Battery System.
Every MX 24V 4.0 AH battery and charger is compatible with the LawnMaster MX 24V cordless range. So you can expand your cordless garden power tool collection in a cost effective and environmentally conscious way.
Learn
5 Min Read
3 Min Read

3 Min Read
Support
We’re here to empower you with the knowledge and solutions to make the most of your machine, and to support you when you just need a helping hand. Our friendly, UK based, customer service team are here to help.
This LawnMaster appliance, spare parts and accessories carry a 2-year guarantee.
Free and Fast Delivery:
We offer free delivery on all UK mainland orders* and free next working day delivery on all orders that include an appliance.
Orders for spare parts and accessories are despatched via a 48hr standard delivery service.
* Delivery charges apply for addresses in the Channel Islands, Northern Ireland, Isle of Scilly and Man.
Returns:
We hope that you are happy with your purchase but if that's not the case, unused, undamaged products can be returned for a refund within 30 days of receipt.
Our aim is to keep it personal. Our friendly UK based customer service team are there if you need a helping hand.
Sign up to our mailing list and get 10% off your next purchase, plus access to exclusive benefits including: