Regular price £7.99
Free Next Day Delivery
Buy Direct from the Makers
UK Customer Support
Support
VSD1801UK
Learn how to set up and use your cordless vacuum cleaner with instruction manuals, user guides and FAQs.

1) This vacuum cleaner features a foldable handle for easy storage. Unfold the upper section of the handle until it securely clicks into position. Make sure the handle is locked into place.
2) Position the neck of the floor head into the upright position. Insert the complete handle assembly onto the neck of the motorised floor head ensuring that there is nothing trapped between the unit connections. Check that both security latches on the motorised floor head are clicked into place.
3) Place the handheld unit into the docking bay on the main body. Ensure the suction port of the handheld unit is positioned into place first and that the dust bin is securely fitted before pressing the handle into the locking position.
4) Insert the vacuum cleaner onto the charging base and click into place.
NOTE: To optimise the battery longevity, ensure the vacuum cleaner is fully charged before first use. Charge the vacuum cleaner for at least 5 hours before using for the first time.
Emptying the Dust Bin
NOTE: For the best performance, empty the dust bin after every use. Never operate the vacuum cleaner without the dust bin and filter in place.
1) Remove the handheld vacuum cleaner from the main body by pressing the handheld vacuum cleaner release button and detaching the handheld unit.
2) Hold the unit over a suitable household waste bin, and use one hand to press the two dust bin release buttons.
3) To separate the dust bin from the handheld vacuum cleaner body, lift the released end first and pivot the dust bin upwards to detach the unit from the holding clip at the filter end of the unit.
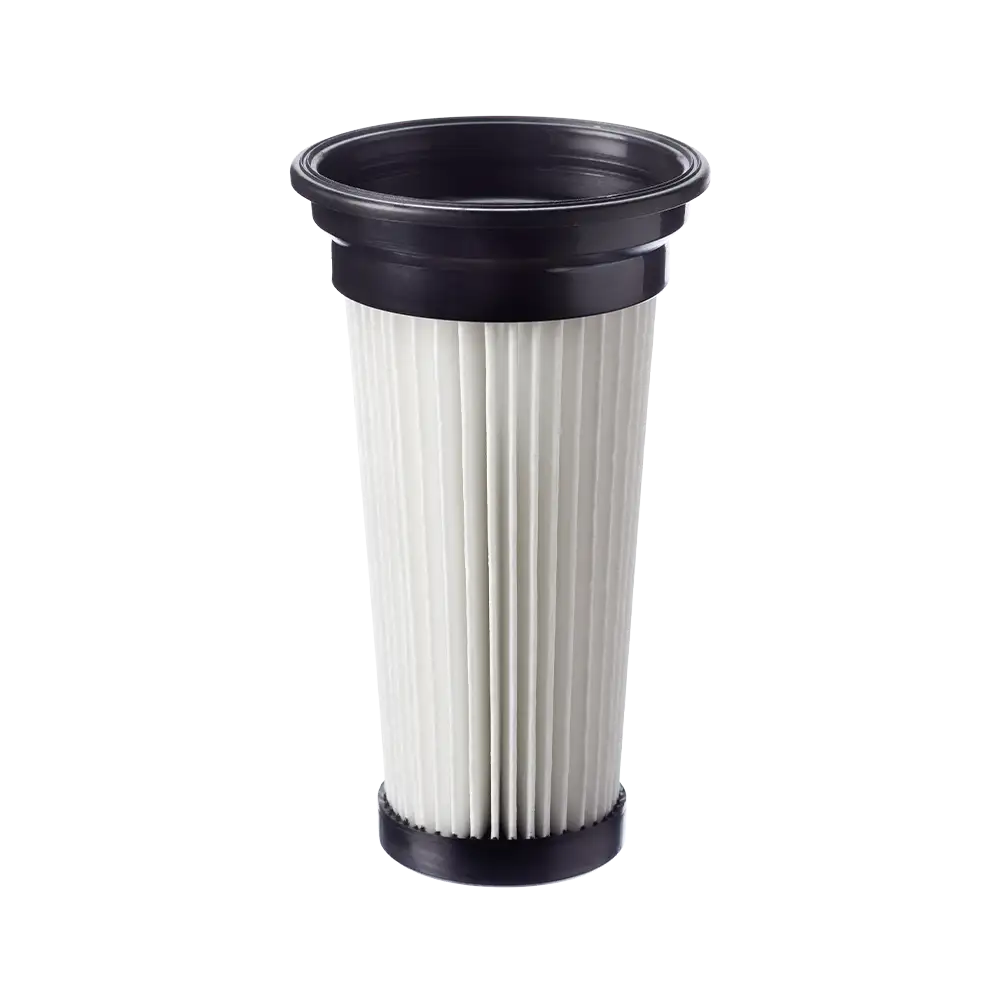
4) Remove the filter basket from the dust bin. Empty the contents into a waste bin.
Cleaning the Filter
NOTE: The key to maximum performance is having a clean filter. Cleaning the filter frequently will help your vacuum cleaner operate at peak efficiency. A spare filter is provided with your vacuum cleaner to allow you to dry one filter properly while using the other. Additional filters can be purchased from www.cleva-europe.com.
1) Remove the filter from the filter basket. With a soft, dry brush, clean any accumulated debris from the side screens of the filter and the filter basket.
2) After repeated use, it may be necessary to wash the filter basket and filter. Hand wash in warm water. After washing, set aside and allow to air dry for 24 hours.
IMPORTANT: Ensure the filter and filter basket are completely dry before reinstalling.
3) Insert the clean and dry filter into the basket and fit the basket into the dust bin ensuring an air tight seal is formed around the dust bin opening.
4) Reconnect the dust bin to the handheld vacuum cleaner. To do so, insert the filter end of the dust bin into the holder first and ensure the holding clip is securely located into the dust bin lid. Press the other end of the dust bin into position until you hear a ‘click’.
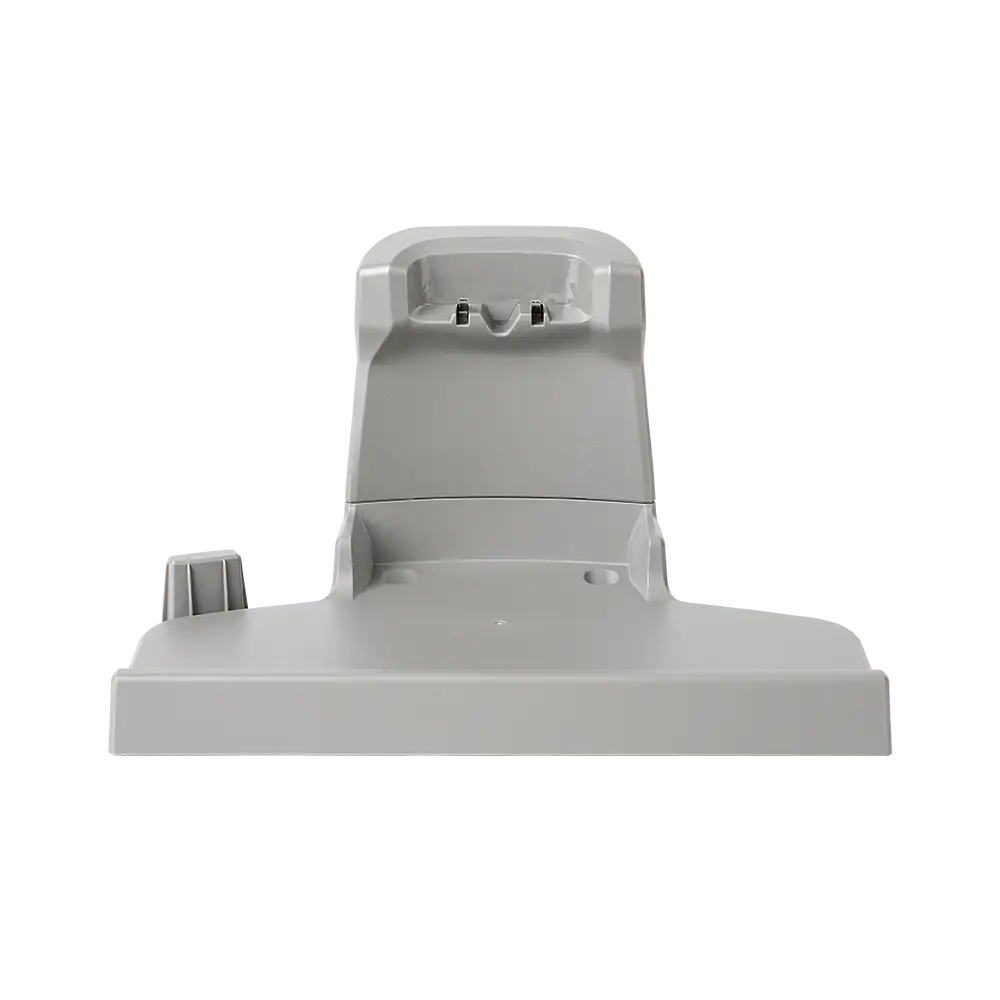
Cleaning the Motorised Floor Head and Removing Blockages
The brush roll may accumulate debris such as strings, hair and fibres. This type of debris can wrap around the brush and diminish its ability to clean effectively.
Remove Brush Roll for Cleaning
1) Make sure the vacuum cleaner is turned OFF, then remove the handheld vacuum cleaner and set aside.
2) You can remove the motorised floor head for easy maintenance by pressing the two motorised floor head release buttons located on either side of the unit neck. Press the two release buttons and simultaneously pull the motorised floor head from the main body.
3) Turn the unit over to access the brush roll.
4) Locate the release lever on the right side of the brush roll. Apply pressure to the bottom of the tab and slide the tab to the right to unlock. Lift the brush roll out of housing.
5) Clean off debris and anything wrapped around the brush. Use a pair of scissors to remove threads, hair etc. If you see any hair stuck in the end cap area, remove the end cap from the brush roll to remove the hair. Then reinstall the end cap.
6) Reinsert the brush roll back into the housing by aligning the hexagon end of the brush roll into the motorised floor head unit first, ensuring it is fully and securely placed onto the mounting bracket. Then, insert the octagon end correctly into place and lock the securing tab back into position.
Remove Motorised Floor Head Blockages
1) To clean out the motorised floor head, press the two release buttons, and pull the head away from the main body.
2) Flex the connection hose to ensure you can see straight through the other end. If you can see any blockages in this area, carefully remove them.
3) Reattach the motorised floor head onto the vacuum body.
Genuine Vacmaster accessories and spare parts for your machine.
Regular price £7.99

Regular price £7.99

Regular price £7.99

Regular price £29.99
Regular price £9.99

Regular price £7.99

Regular price £10.99

Regular price £44.99
We stock a wide range of spare parts if you'd like to repair your machine, rather than replace it. If you can't find the part you are looking for in the accessories section above, please get in touch with us. For safety, certain parts may not be available individually, but as part of a combined unit.
FAQ
This can be caused by:
1) Charging adapter is not plugged in. Be sure the charging adapter is plugged in properly to the power supply and to the charging port on the side of the charging base.
2) Debris accumulated on the metal charge contacts on the handheld vacuum cleaner, main body and charging adapter. Be sure no debris is accumulated on the metal charger contacts on the handheld vacuum cleaner, main body and charging adapter.
This can be caused by:
1) Brush roll is jammed. Remove any obstruction.
2) Brush roll needs to be reset. Turn the unit off and remove the obstruction, then turn back on.
3) Brush roll is not installed correctly. Remove the brush roll and reinstall.
This can be caused by:
1) Battery may be depleted. Charge the battery.
2) Brush roll is jammed causing motor protection system activated. While off, remove obstruction and then turn unit on.
Learn
2 Min Read

1 Min Read
Support
We’re here to empower you with the knowledge and solutions to make the most of your machine, and to support you when you just need a helping hand. Our friendly, UK based, customer service team are here to help.
This Vacmaster appliance comes with a 1-year guarantee.
Free and Fast Delivery:
We offer free delivery on all UK mainland orders* and free next working day delivery on all orders that include an appliance.
Orders for spare parts and accessories are despatched via a 48hr standard delivery service.
* Delivery charges apply for addresses in the Channel Islands, Northern Ireland, Isle of Scilly and Man.
Returns:
We hope that you are happy with your purchase but if that's not the case, unused, undamaged products can be returned for a refund within 30 days of receipt.
Our aim is to keep it personal. Our friendly UK based customer service team are there if you need a helping hand.
Sign up to our mailing list and get 10% off your next purchase, plus access to exclusive benefits including: